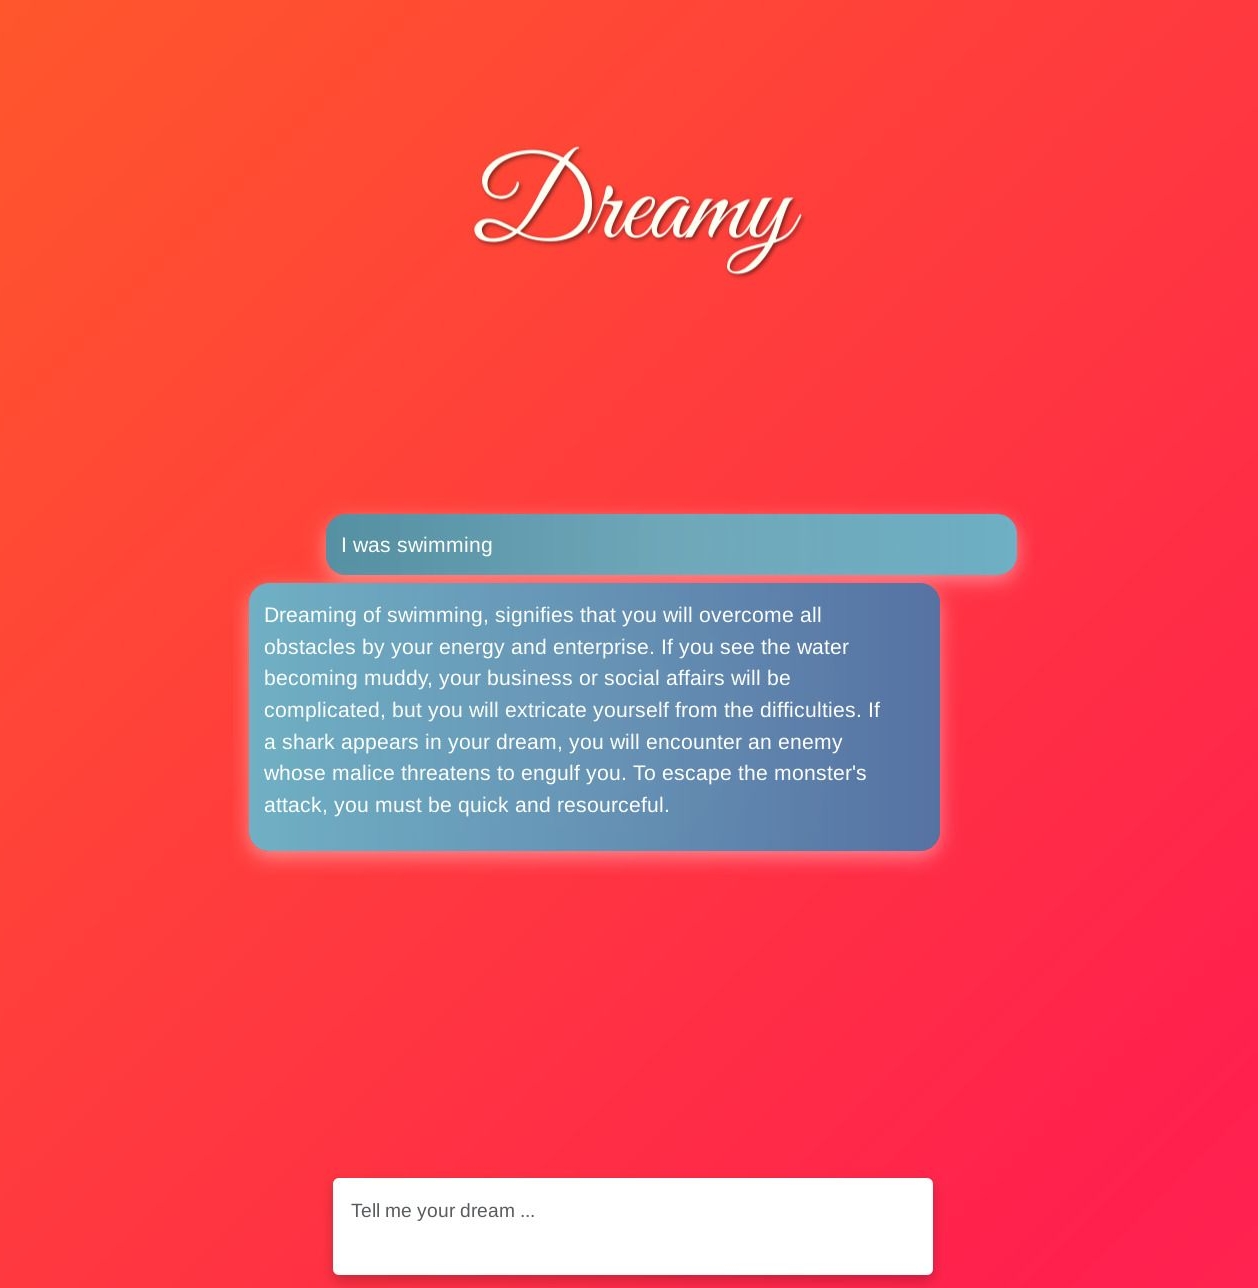
Interface: Dream Interpreter (with ollama-ui)#
Code Editor#
We’ll work with VSCode / VSCodium:
VSCode — VSCode developed by Microsoft
VSCodium — VSCode without tracking and telemetry
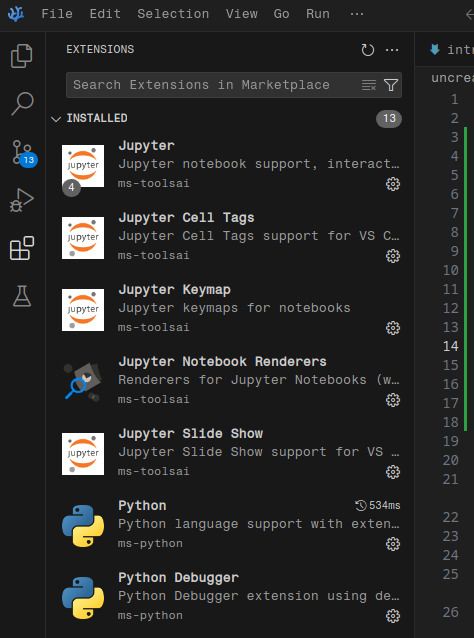
Extensions#
After installation, go to the Extensions-tab and install the following extensions:
Python
Jupyter
Live-Server
Virtual environment#
It is recommended to create a virtual environment for your project/ setup. All the libraries and dependencies installed for this project are isolated and won’t conflict other libraries and their dependencies. The easiest way to create a virtual environment is conda.
Miniconda#
Download Miniconda for your OS and execute the installer.
Open the Terminal inside VSCode: Terminal -> New Terminal and type the following commands, line by line, execute each one of them with pressing Enter.
# check if conda is installed
conda --version
Create a new environment#
# create a new environment called "lab" with Python version 3.12
conda create -n lab python=3.12 -y
The word after the -n flag (in this case “lab”) is the name of your environment and you have to type it when you start it later on, so make sure it’s not too long and easy to remember.
You can see all environments created by you with the following command:
# list available environments
conda env list
Next we can activate our newly created environment.
# activate your environment
conda activate lab
Install external packages with pip#
We can use Python’s package installer pip to install external libraries like jupyter
# important: activate your environment first
conda activate lab

# install the library jupyter with pip
pip install jupyter
Deactivate conda#
When we’ve finished our work, we can deactivate the environment with:
# deactivate environment
conda deactivate
Remove an environment#
conda remove -n <my environment> --all
Python#
Python is an easy to write general purpose programming language, meaning it can be used for a variety of different applications.
Installing the ollama-ui#
git clone https://github.com/ollama-ui/ollama-ui
cd ollama-ui
rm -r .git*  # confirm with 'y'
make

open http://localhost:8000 # in browser
OR use the Live-Server plugin using right-click Open with Live-Server.
Removing the integrity to avoid errors, open the index.html and remove the integrity="..." attributes.
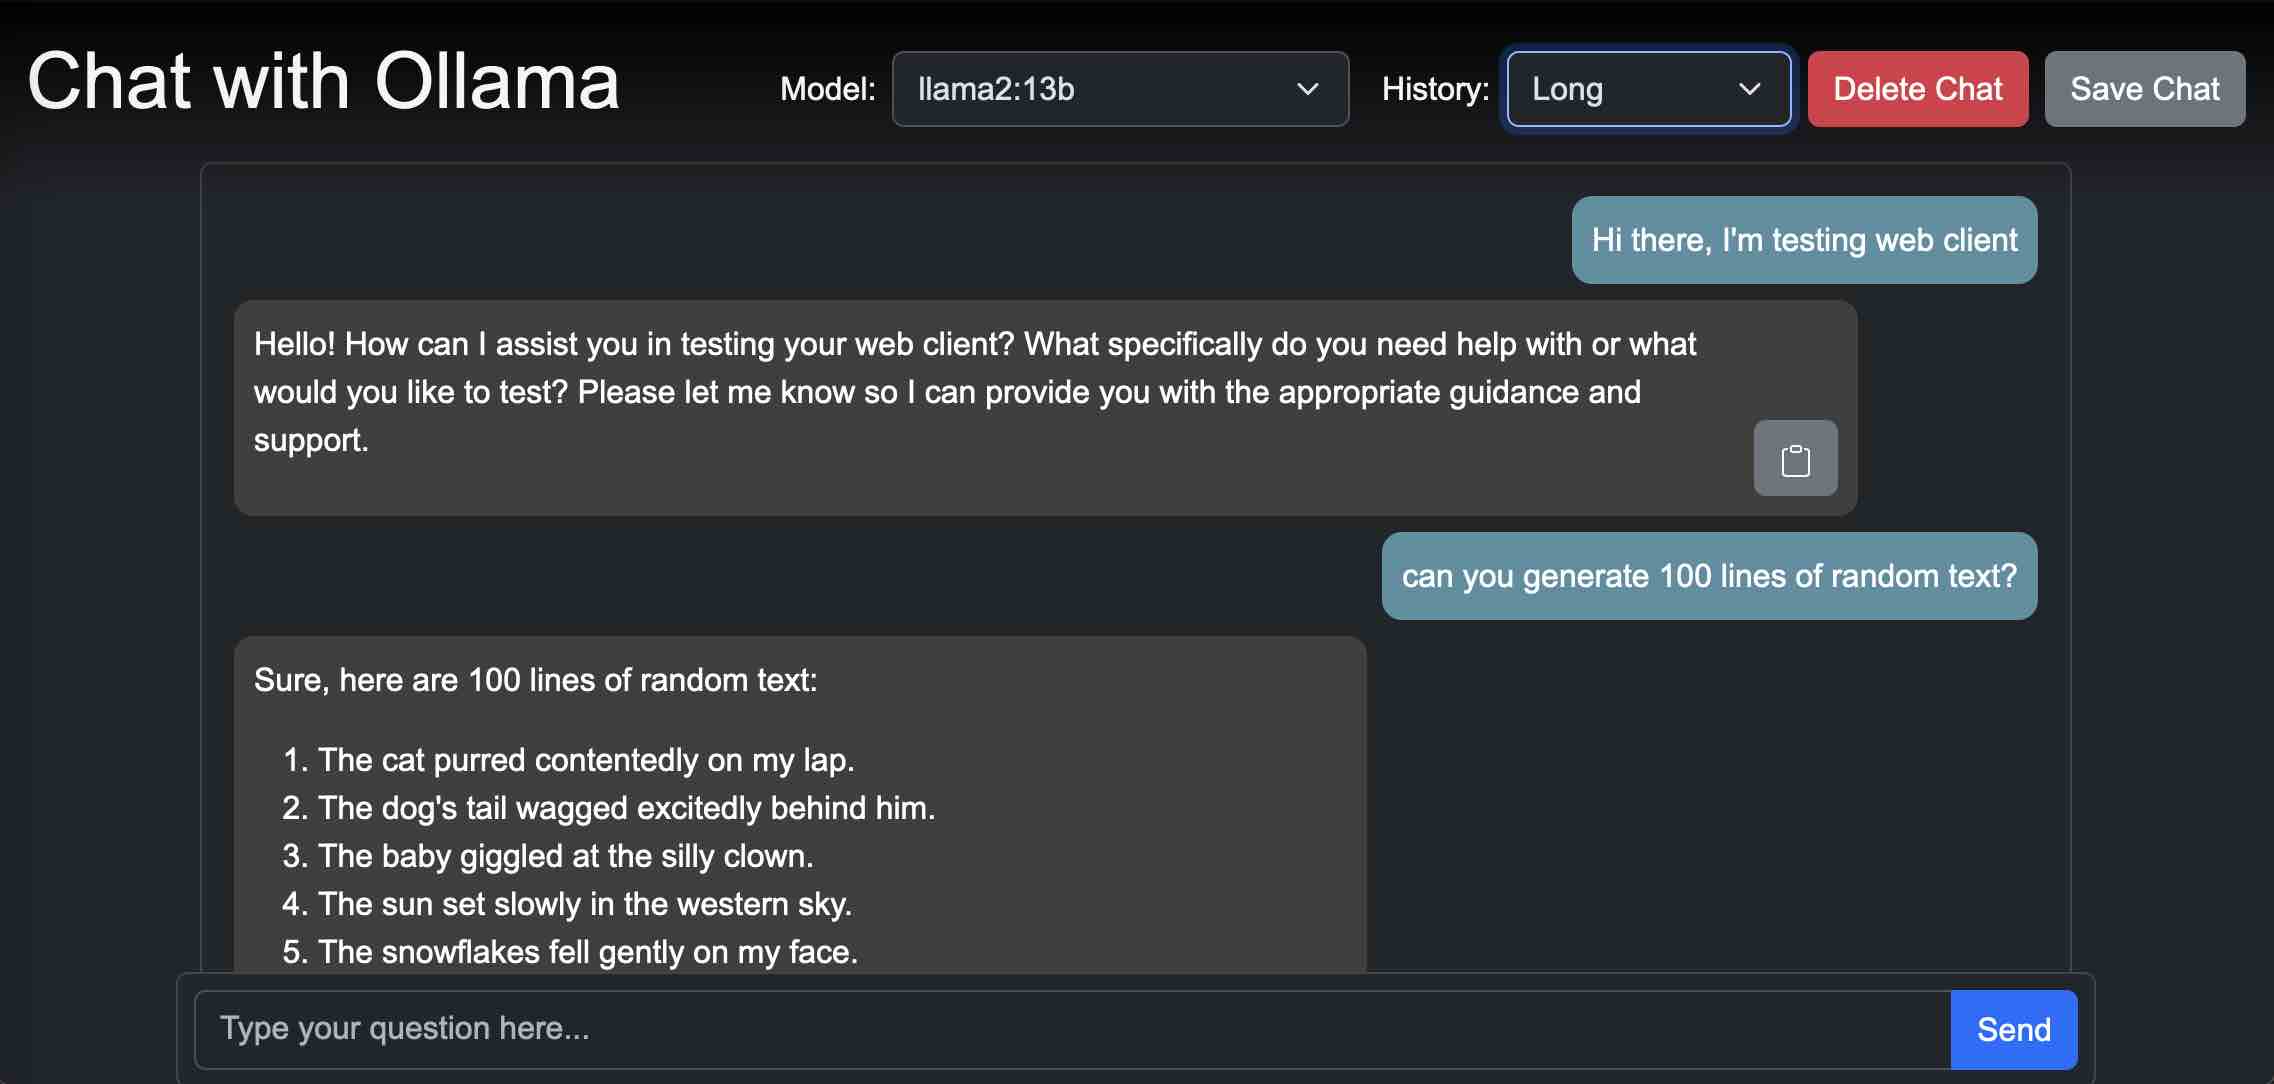
Using the interface#
The interface has several drop-down fields for selecting the model, defining a system prompt etc. We want to reduce this functionality to serve only the purpose of interpreting our dreams.
Remove the select menu from index.html:
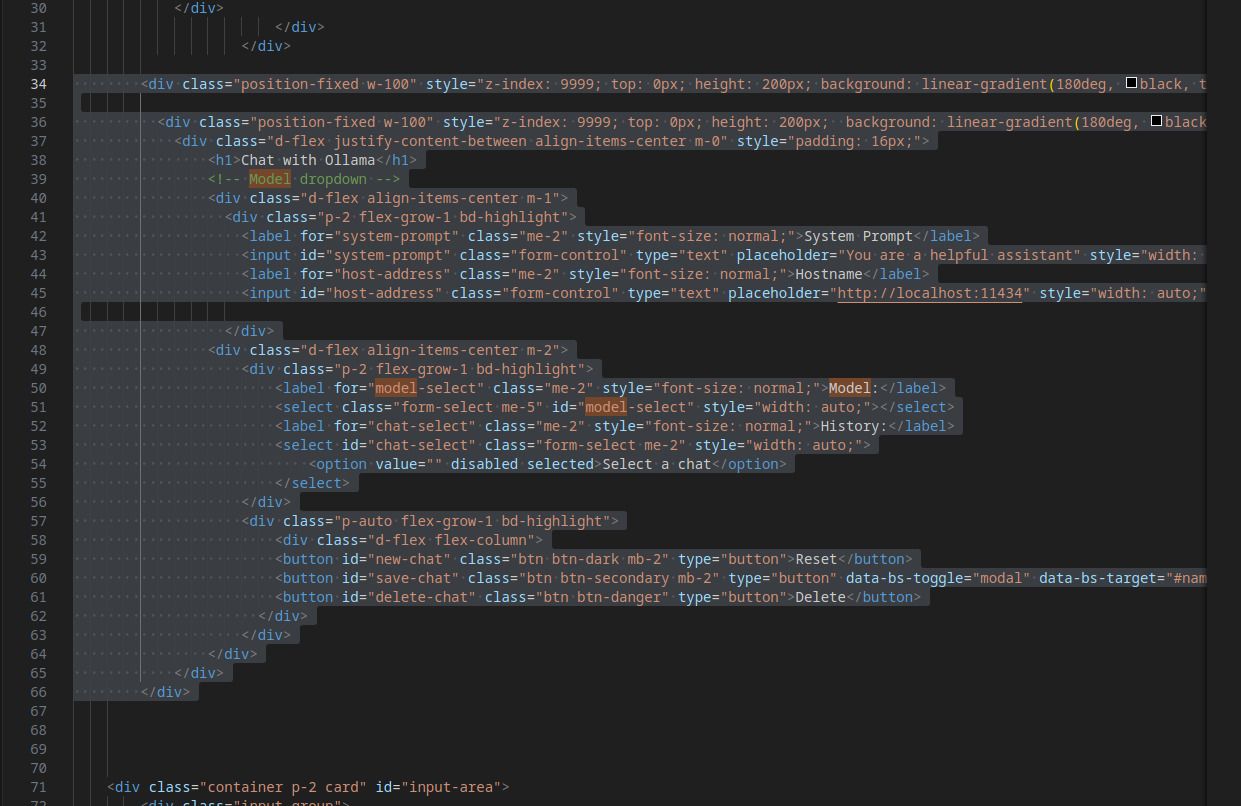
Change the placeholder “Type your question here …”
Open chat.js and set a fixed model and remove the system prompt:
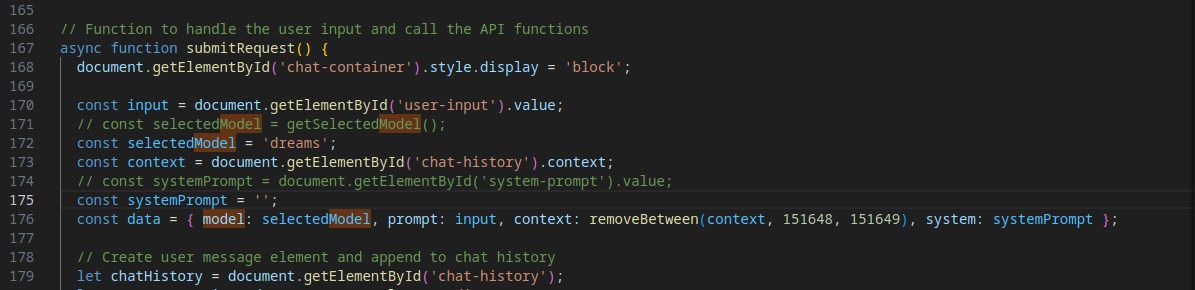
Optional: Remove the copy button (let copyButton and the following lines).
Modify the style of the page (chat.css) by hand or with your favorite chatbot. Best save it as a new file like dreamy.css and change the corresponding section in index.html:

Adding Text-to-Speech#
We can use the browsers internal text-to-speech functionality using the SpeakIt library in JavaScript.
Paste the following snippet at the end of your index.html just after <script src="chat.js"></script>:
  <div class="m-2 position-fixed">
    <label for="language-select" class="me-2" style="font-size: normal;">
      Language:
    </label>
    <select
      id="language-select"
      class="form-select"
      style="width: auto;"
    >
      <option value="" disabled selected>Pick a language…</option>
    </select>
  </div>
  <script src="https://mobilepadawan.github.io/Speakit-JS/ttsl/js/Speakit1.0.0.min.js"></script>
  <script>
    const languageSelect = document.getElementById('language-select');

    // Populate the select with available voices
    async function loadVoices() {
      try {
        const voices = await Speakit.getVoices();
        languageSelect.innerHTML = '<option value="" disabled selected>Pick a language…</option>';
        voices.forEach(voice => {
          const opt = document.createElement('option');
          opt.value = voice.lang;
          opt.dataset.voice = voice.name;
          opt.textContent = `${voice.lang} – ${voice.name}`;
          console.log(`${voice.lang} – ${voice.name}`)
          languageSelect.append(opt);
        });
      } catch (e) {
        console.error('Failed to load voices', e);
      }
    }

    /**
     * Speak the given text using the currently selected language/voice.
     * @param {string} text The text to be spoken.
     * @returns {Promise<void>}
     */
    function speakText(text) {
      const lang = languageSelect.value;
      const voiceName = languageSelect.selectedOptions[0]?.dataset.voice;

      if (!lang || !text) {
        return Promise.reject(new Error('Please select a language before speaking.'));
      }

      return Speakit
        .readText(text, lang, voiceName);
    }

    // initialize voices on page load
    loadVoices();
  </script>
Now add the speaking-functionality in chat.js after line 239 like in the following example:
.then(() => {
    stopButton.remove(); // Remove stop button from DOM now that all text has been generated
    spinner.remove();
    speakText(responseDiv.innerText) // Add this line
})